
This sponsored post features a product relevant to our readers while meeting our editorial guidelines for being objective and educational.
Ihost a podcast called The Indie Dev Podcast where I interview game developers from around the world in30-minute segments. I’m always fascinated by what people are able to create,and I’m even more curious about how they make these games happen.
Istore the most recent episodes of the podcast on PodOmatic, which allows themto be picked up by iTunes and other podcast feed readers, but I am limited bythe number of podcast episodes that I can store at once because I am using thefree tier. My older episodes are lost unless I upgrade to the premium tier.
What Problem Does Blob Storage Solve?
Withblob storage, I can take all of my .mp3s, store them in a container, and thenallow the public to download them from the container.
WhenI upload my files to a blob container, I am given an HTTP endpoint, which I canuse as a link to download an episode. Click on this link to download the most recent episode with Michael Hicks. Youcould do the same for videos that you record, too.
Inthis tutorial, I’m going to walk you through the steps of how I set up mycontainer to host all of the .mp3s of the podcast.
How Does Blob Storage Work?


Blobstorage is a service for storing large amounts of unstructured data, such astext or binary data, that can be accessed from anywhere in the world via HTTPor HTTPS. You can make these files public or private as well, which means thatyou can use it as a storage repo for your own content for only you to access,or perhaps use it as a cost-effective way to store large amounts of media toshare with others.
Commonuses of Blob storage include:
- serving images, documents, audio, or video directly to a browser
- storing files for to be distributed to others
- streaming video and audio
- performing secure backup and disaster recovery
Youcan find out more about Blob Storage here.
Blob Concepts and Terms
- Storage Account: All access to Azure Storage is done through a storage account.
- Container: A container provides a grouping of a set of blobs. All blobs must be in a container.
- Blob: A file of any type and size. There are two types of blobs that can be stored in Azure Storage: block and page blobs. Most files are block blobs, and we’re going to use those for this tutorial. A single block blob can be up to 200 GB in size.
-
URL format: Blobs are addressable using the following URL format:
http://<storage account>.blob.core.windows.net/<container>/<blob>
The following example URL could be used to address one of the blobs in the diagram above: http://sally.blob.core.windows.net/movies/MOV1.AVI
How Do I Get Blob Storage?
You’llneed a cloud storage solution like Azure. You can sign up for a free Azure trial, or reachout to me for information onhow to obtain a BizSpark account. This is what I use to host the files, but you can followalong if you prefer other solutions too.
Creating a Storage Account
You’vegot an understanding of how blob storage works now, as well why you’d want touse it. Let’s go through the process of creating an account and a container.This is directly from the blob storage blogs on the Azure portal:
Touse Azure storage, you’ll need a storage account. You can create a storageaccount by following these steps. (You can also create a storage account byusing the Azure service management client library or the service management REST API.)
Login to the Azure Management Portal.
Atthe bottom of the navigation pane, click NEW.


ClickDATA SERVICES, then STORAGE, and then click QUICK CREATE.


In URL, type a subdomain name to use inthe URI for the storage account. This value becomes the host name within theURI that is used to address Blob, Queue, or Table resources for thesubscription.
Choosea Region/Affinity Group in which is closest to your current location.
Optionally,you can select the type of replication you desire for your account.Geo-redundant replication is the default and provides maximum durability,meaning your files will be backed up across multiple datacenters in the samearea. So if Godzilla comes to attack, and takes out one datacenter, your infois still backed up in another one.
ClickCREATE STORAGE ACCOUNT.
You’reready to roll. Now you can create a container which will host your files.
Creating a Container
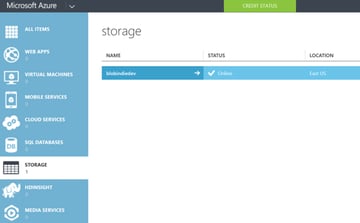
Inthe Azure portal, click on the Storage icon on the left hand side of thescreen. A new screen will appear with the name of the account you createdabove. In my case, it is called blobindiedev.

Click on the name of the blob, thenContainers at the top of the page. You’ll make a new one here. At thebottom of the page, click on Add to create a new container.


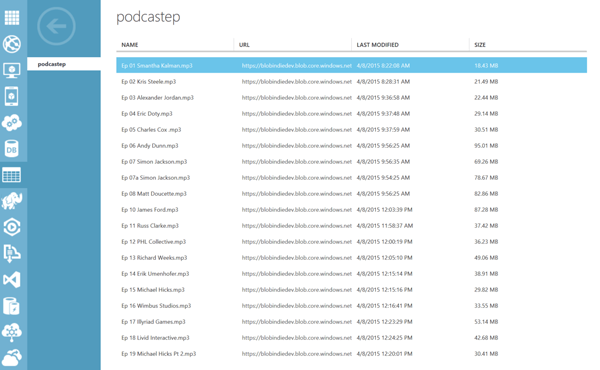
I called mine podcastep, as thiswill hold all of my episodes.
Bydefault, the container is private and can be accessed only by the accountowner. To allow public read access to the blobs (.mp3s) in the container, butnot the container properties and metadata, use the “Public Blob” option. Toallow full public read access for the container and blobs, use the “PublicContainer” option. We want Public Container.


We’reready to upload files to this container from Visual Studio now.
UploadingFiles From Visual Studio
Forthis part you’ll need Visual Studio. You can download the VS 2013 Community Edition for free fromhere. You’ll also need theAzure SDK to access your Azure account from Visual Studio. Download the SDK here. You’ll need the SDK that matches the version of VisualStudio you are using. If you have VS 2013 installed, you’ll want to use the VS 2013 Azure SDK.
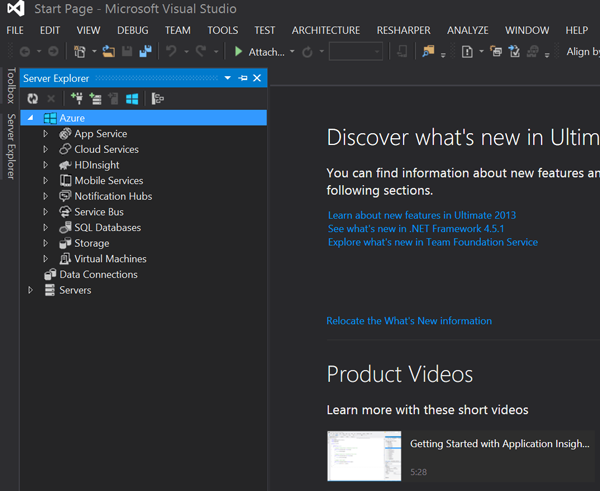
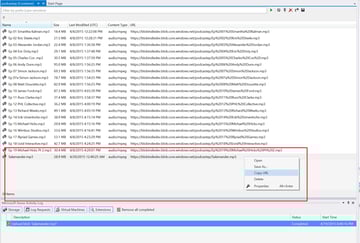
Withthat installed, open Visual Studio, click on the Server Explorer andlook for the Azure button. Click on Storage and it should ask you to login to your account.

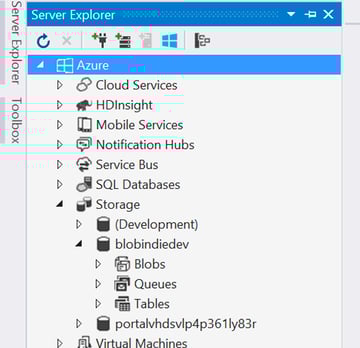
Click on Storage and you should see thenew Blob storage account you created as well as the container which will host theepisodes.

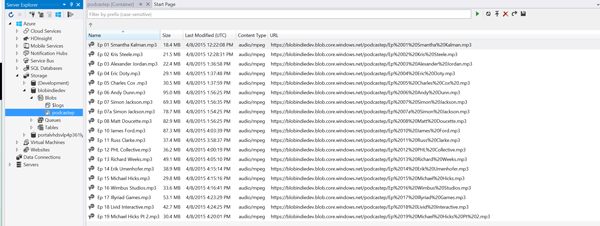
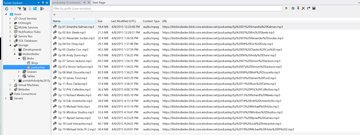
Clickon the Blobs icon / text to see your container. I see podcastep, as well as anyfiles I have uploaded there.
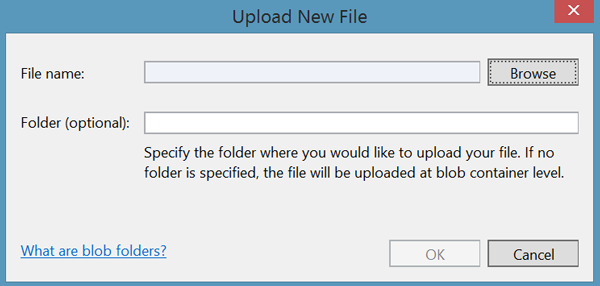
To upload your own files, click on theUpload Blob icon, which is an arrow pointing to a horizontal line.
Apop-up window will appear, and will ask you to browse to the file you want toupload.
In my case, I’m looking for podcastepisodes. You should see the Azure Activity Log appear at the bottom ofthe screen, which notifies you of the file’s current status.
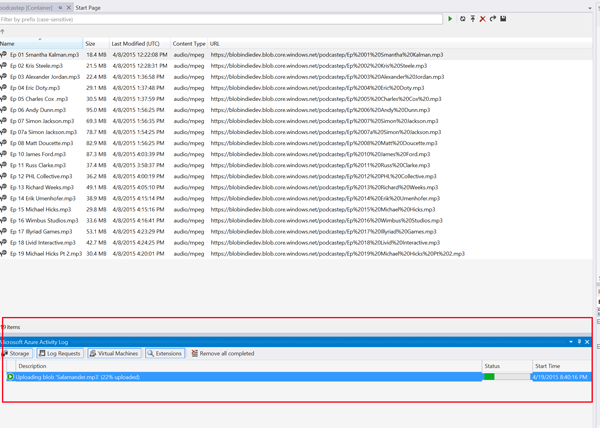

Once it has completed uploading, rightclick on the file, and copy the URL.

That URL is how others can downloadyour files now! On my webpage I provide a link to that URL on every episode,and folks now all of my episodes are made available!
Ifyou navigate back to the Azure Portal, you can see that they are all there too.

Conclusion
AzureBlob Storage is a cost-effective way of saving and serving content across theinternet. The blob storage page has more information, but hopefully after this, youunderstand the value in it. I can record my podcast and easily serve it toanyone around the world, without having to pay monthly fees or build anyhardware on my own. Best of all, it took me a total of five minutes to get thefiles online.
Anyquestions? Feel free to reach out.
Here’sa full list of the tutorials in this series:
- Intro to HTML5 video
- Intro to Azure Media services, AES, and PlayReady DRM
- Live streaming HTML5 video using Azure Media Services
- Using Azure Blob Storage to store & serve your audio and video files
- Use this Azure Media Player for streaming Media Service video to all devices
- Uploading video to Azure Media Services
This article is part of the web dev techseries from Microsoft. We’re excited to share MicrosoftEdge and the new EdgeHTMLrendering engine with you. Get free virtual machines or test remotely on your Mac, iOS,Android, or Windows device @ dev.modern.ie.
 By
By


